|
August 24, 2015 07:13:09
Posted By Kepler Lam
|
|
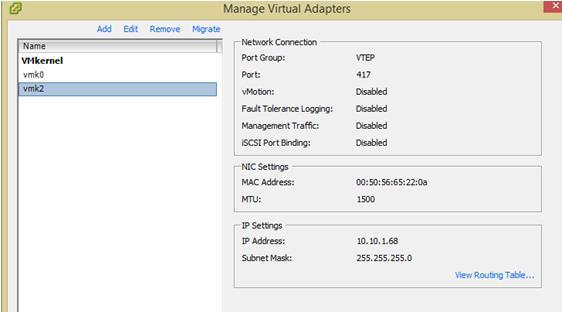
To setup the VXLAN in the Nexus 1000v, just follow this Cisco guide. Configuration steps as follows: Step 1. Enable the VXLAN Feature feature segmentation Note that don’t be confused with the Cisco’s example. Though it just mentions to turn on the segmentation feature, the show feature output also display the network-segmentation feature. So I also turn the later on, that is a MISTAKE! As I find out that if the network-segmentation feature is on, the VEM will never send out multicast packets. It waste me almost a day to figure out the problem. Step 2. Configure the Default Mode Step 3. Configure the VTEP Port-Profile For the VTEP VLAN, as I will configure the VTEP address (10.10.1.68) inside the subnet of my local PC, and recall that my ESX’s NIC actually bridge to my local PC, thus I use VLAN 1 (which is the native VLAN). port-profile type vethernet VTEP Step 4. Create the VTEP VMKernel Interfaces (under vCenter)
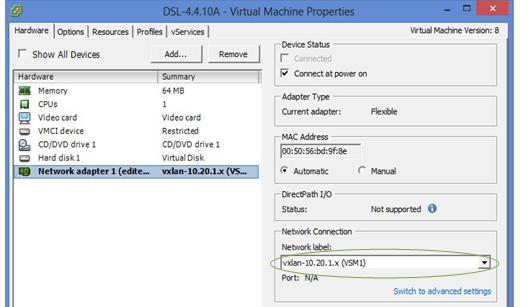
Step 5. Create the Bridge Domain bridge-domain 10.20.1..x Step 6. Create the VXLAN Port-Profile for VMs Step 7. Assign the VXLAN Port-Profile to VMs (under vCenter) The NICs of the 2 different DSL VMs (with IP address 10.20.1.101 and 10.20.1.102 respectively) are changed to use the VXLAN portgroup.
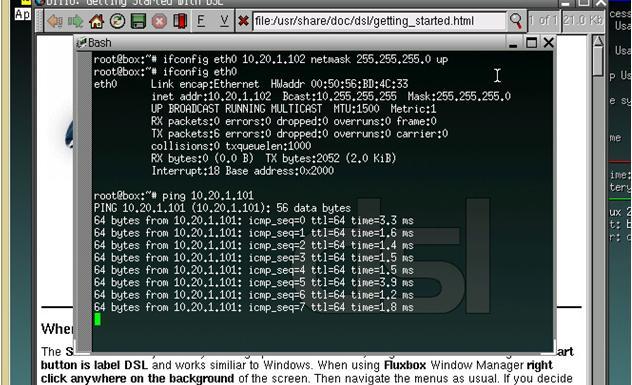
Now I can ping between the 2 different VMs.
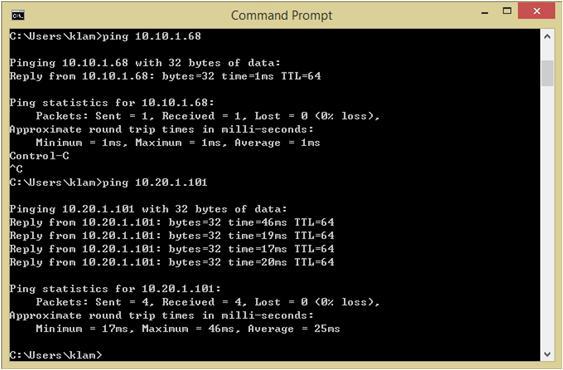
Now to bridge my loopback interface (with IP address 10.20.1.63) of my local PC to the VXLAN, I need to execute the Ubridge tool. (The next blog entry explains more detail about the UBridge configuration). My PC’s local NIC card uses IP address 10.10.1.63 which will be the VTEP address, execute the Ubridge as follow: c:\> ubdg.bat 5000#W:E 5000#V:E@10.10.1.63:225.1.1.1 Now I can ping between my loopback interface and the 2 VM’s IP address.
|
|
|


All blog contents are provided by website administrator. All other trademarks and copyrights are the property of their respective holders.
Copyright © 2026. Doteasy Technology Inc. All Rights Reserved. Blog software owned and powered by Doteasy Web Hosting.