|
September 23, 2014 05:02:58
Posted By Kepler Lam
|
|
Recently, just prepared a customized course about CUCM 10. One of the topics is about the Jabber on CUCM 10. It seems that it is not so clear about the Jabber integration with CUCM without the IM&P server (previous CUPS). As many of the Cisco documentation just mention how to configure Jabber to register to the IM&P server, without mentioning how to configure Jabber as a standalone (or desktop phone control) phone that doesn’t really need the IM&P. This blog entry wants to explain how to configure it. Moreover, most of the configuration examples also involve the LDAP, DNS (though in real environment, most likely you will have those infrastructure components). Yet, you don’t need all those for the very basic configuration. All you need is:
Then you can immediately configure your Jabber as a softphone in just few steps. Here it is:
Step 1. Create a CSF device Under Device > Phone, add a new phone with type Cisco Unified Client Services Framework. Specify a name for the CSF device in the Device Name. Configure all other necessary fields. Click Save.
Then configure a new directory number for the CSF device.
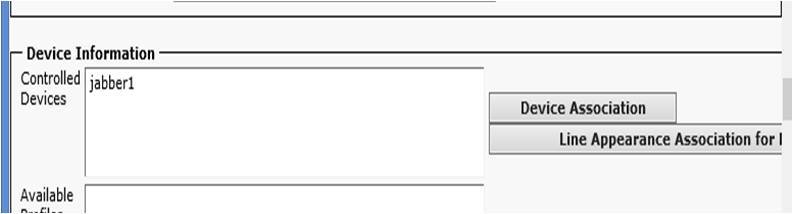
Step 2. Add/Modify an End user Under User Management > End User, add or modify an end user. Associate the CSF phone you just created to the End user (or set the CSF device owner as the end user under step 1 above). Then add the user to Standard CCM End User Group (this step is quite important, without that the Jabber will not able to login). Please follow the other Blog entry Jabber setup without IM & Presence server (Part 2) |
|
|


All blog contents are provided by website administrator. All other trademarks and copyrights are the property of their respective holders.
Copyright © 2026. Doteasy Technology Inc. All Rights Reserved. Blog software owned and powered by Doteasy Web Hosting.